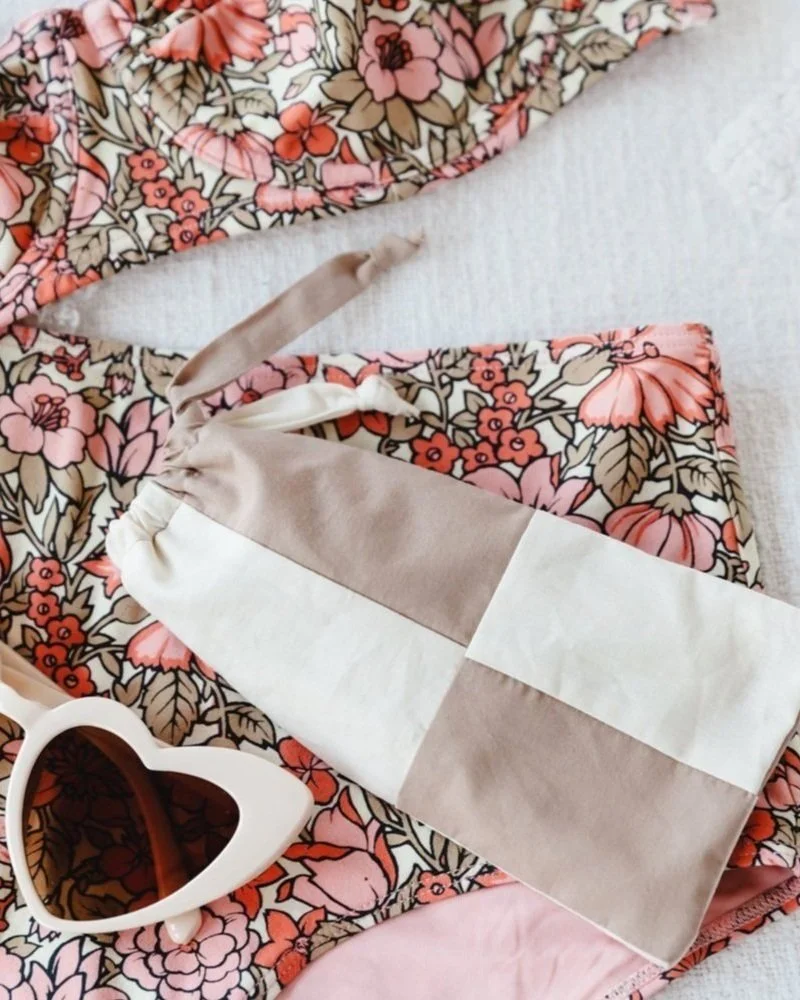
(Easy to Sew) Colorblock Drawstring Pouch
These drawstring bags are fun to make and useful for things like sunglasses or keeping your pens organized. I’ve been needing some of these so badly. I’ve bought sunglasses at Target in the past and then had no case to keep them in. This is the perfect fix!


I chose a Sew Classic Solid Cotton Fabric from Joann in Antique Tan and Tofu. Microfiber would be another good fabric for this project.
I love how the colorblock turned out and it was surprisingly easy to create! There are only eight steps, so this is a great project for quilting beginners. If you are well seasoned at it, well, you’ll be able to whip these up in no time!
How to make an Easy to Sew Colorblock Drawstring Pouch
Supplies
Two contrasting colors of fabric for the outside (I used cotton). A fat quarter should be enough as long as you don’t mess up the cutting!
Ruler
Chalk pencil
Scissors
Matching Thread
Sewing Machine
Safety Pin

Directions
Step One - Cut out the fabric pieces.
From each color of fabric, cut:
two 4 1/4 inches by 3 inches pieces (the patchwork)
two 5 1/2 inches by 3 inches pieces (the patchwork)
one 7 inches by 2 inches piece (the drawstring)
From just one of the materials, cut:
one 8 1/2 inches by 7 1/2 inches piece (the lining)

Lay out the pieces how you want them to color block together. I started with the the 4 1/4 inch by 3 inch pieces as the bottom row, and the the 5 1/2 inch by 3 inch pieces as the top row and alternated colors.


Step Two -Stitch together the side seams on the bottom row (the 4 1/4 inch by 3 inch pieces), alternating colors. Repeat with the top row (the 5 1/2 inch by 3 inch pieces).

Press the seams of both rows, with the bottom row toward one way and the top row toward the opposite way. Trim the seam allowances to 1/4 inch.

Step Three - Pin the top row to the bottom row, lining up the seams. The seams should easily fall into place because they are pressed in opposite directions. Sew in place. Press the seam down and trim the seam allowance to 1/4 inch.


Step Four - Pin the lining piece to the top edge (the top is the row of 5 1/2 inch by 3 inch pieces) of the quilted fabric, right sides facing and stitch a seam along the edge. Press the seam down toward the lining and trim the seam allowance to 1/4 inch.


Step Five - Fold the piece lengthwise (like a hotdog) and pin. With pins, mark a 1 inch gap starting at the lining seam and continuing toward the bottom of the quilted piece. Sew along the outside of the folded piece, leaving the 1 inch gap open. Trim the seam allowance to 1/4”. Clip the corners.


Step Six - Using the 1 inch gap, pull the fabric through bringing the right side facing out. Tuck the lining inside and line up the holes for the drawstring. Press the whole pouch lightly.

Sew around the top edge 1/2 inch down from the edge. This will create a pocket for the drawstring to be inserted.

Step Seven - Place the two 6 1/2 inch by 2 inch strips together and stitch a seam at one of the 2 inch sides. Press the seam open. Trim the seam allowance to 1/4 inch.

Fold lengthwise (like a hotdog) with the right sides facing each other. Pin in place and stitch a seam along the length of the strip (and leaving the ends open). Trim the seam allowance to 1/4 inch.


Pin a safety pin to one end and pull the safety pin all the way through, turning the drawstring right side out. Press flat.
Step Eight - Use the safety pin to pull the drawstring through the drawstring pocket until the two drawstring ends are even. Knot each end. All done!


Enjoy the sunshine!
-Jessie