DIY Felt Mushroom Cat Toy
My kitty loves felt cat toys and I wanted to make her something a little special. These lil' mushroom babies were just the thing! She’s already cuddling with them (she likes to rub her face all over them and bite them while back pedaling - it melts my heart!)
The cool thing about this project is you can do literally any design you want! I have a million ideas for other shapes so I’ll probably never have to buy another toy for her ever! Plus they are SO easy!


How to Make DIY Felt Mushroom Cat Toys
Supplies
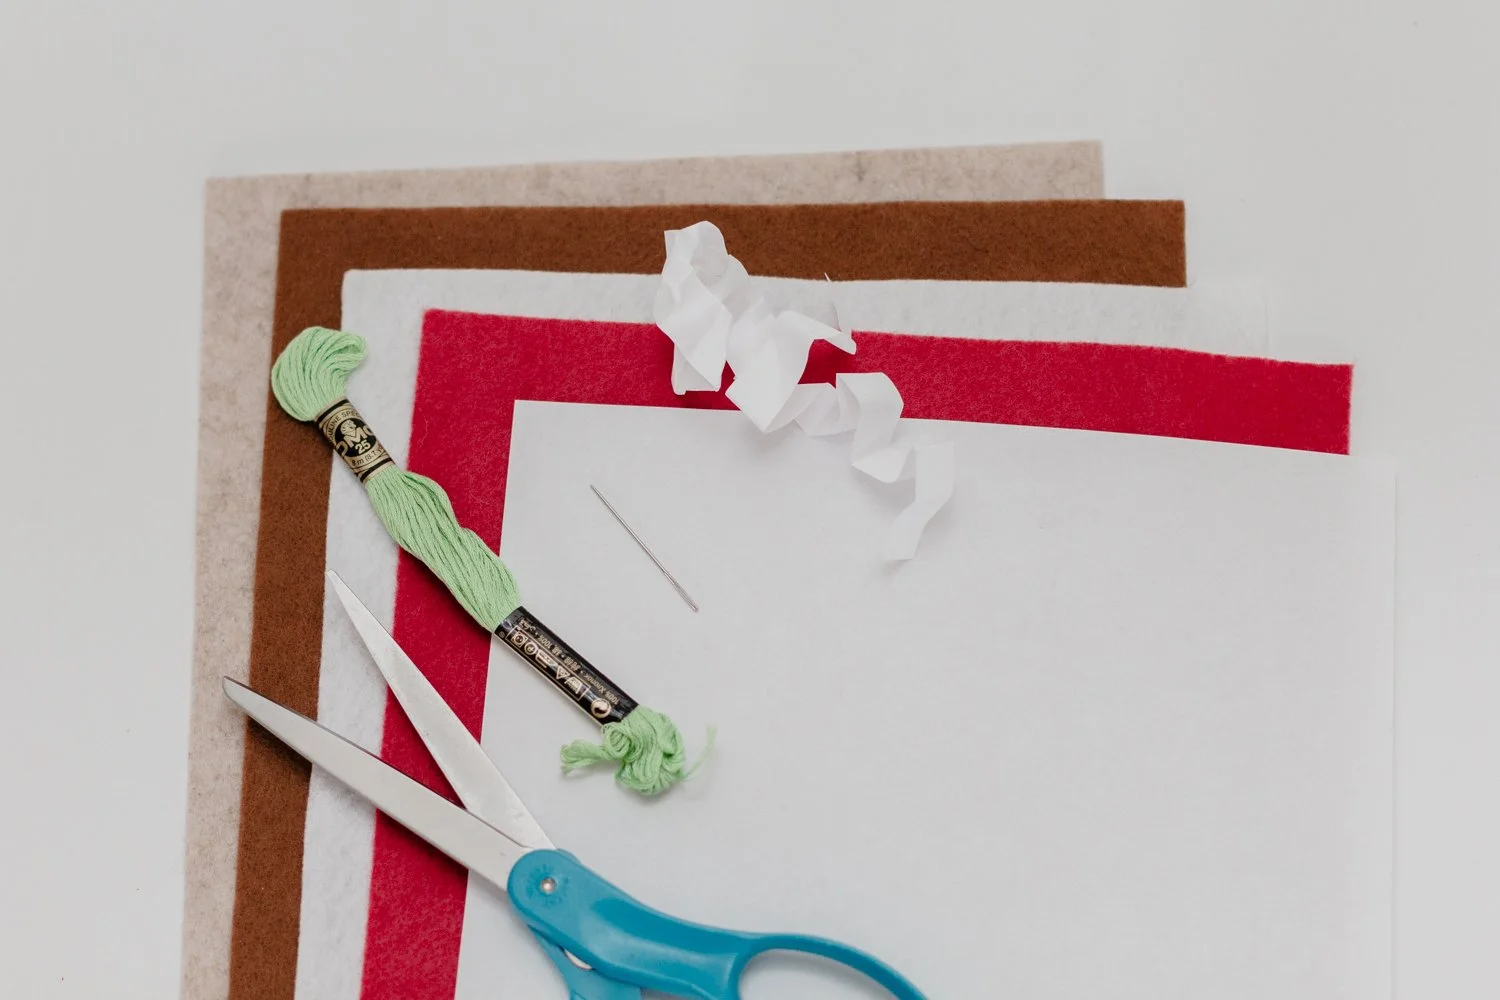
Felt Sheets
Embroidery Thread
Printer Paper
Scissors
Needle
Tips
I found that a sharp needle works best to push through the felt and needles with bigger holes work better for the embroidery thread.
I bought extra felt sheets and didn’t end up needing them. You can get away with using felt scraps if you have any lying around!
Directions
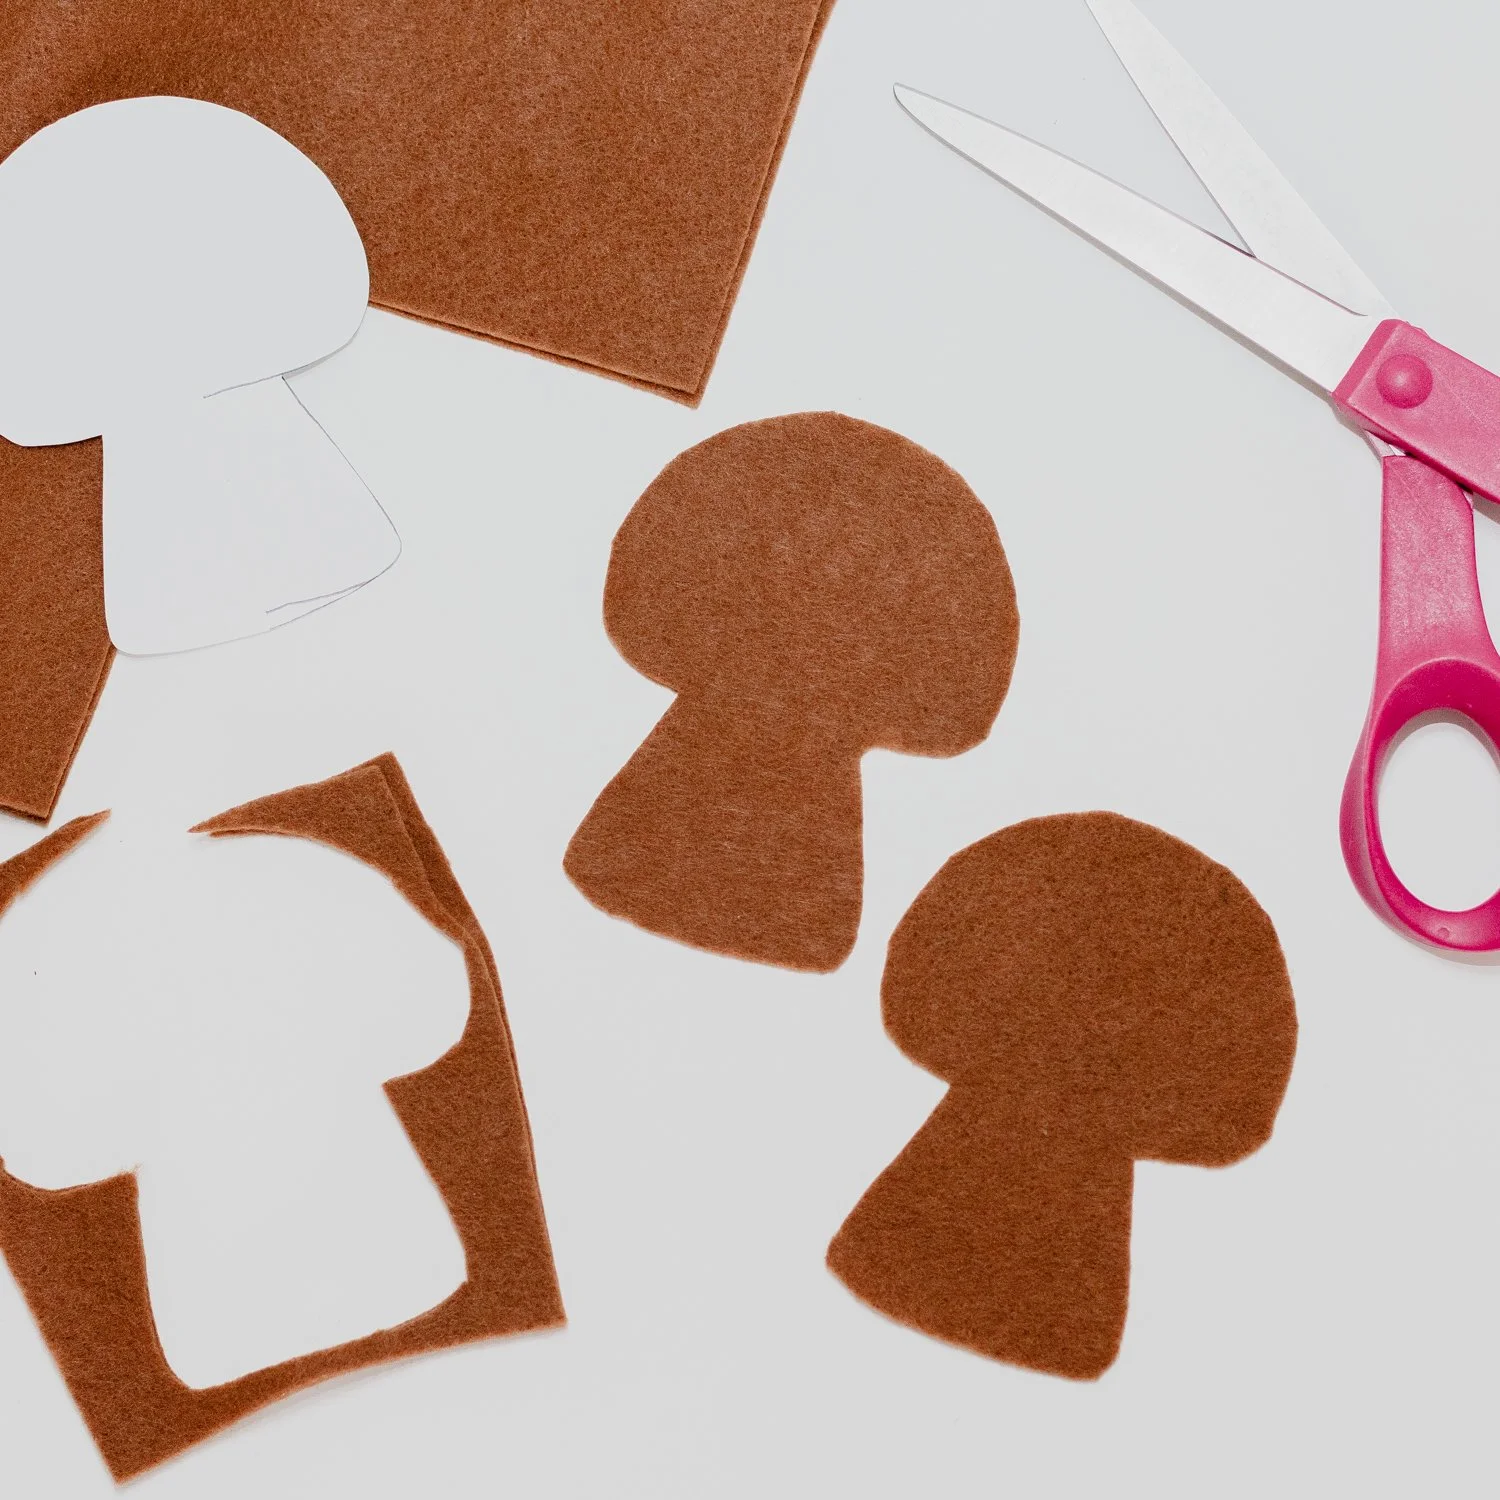
Step One - Fold a piece of printer paper in half and draw out half of your design on the fold. Cut out the design with scissors and unfold it. It’s kind of like making a snow flake or a heart - you want to leave the fold in tact when you cut and then unfold your design to have both sides symmetrical.

Step Two - Double up your felt and place the design on it. Pin it in place and cut around the edges. For the layers of different colors, fold the stem of the mushroom under so you can cut around just the top. Place on a single layer of a different felt color, pin in place, and cut it out. In another color, cut out little circles for the mushroom’s details.


Step Three - Place the mushroom dots on the mushroom topper piece. Using an embroidery thread and needle, hand stitch them into place by doing a basic stitch, pulling the needle through the front and then the back. Stitch the mushroom topper to the full mushroom piece using the same method.


Step Four - Hand stitch the mushroom front to the mushroom back using a blanket stitch. Do this by making a stitch over the edge of the felt, then looping the needle through that stitch before you pull it completely tight. Repeat with each stitch. Leave about one or two inches opening to fill the toy but don’t tie off the thread yet.

Step Five - Cut strips of printer paper (mine took five or six strips) and crinkle them up. Stuff them into the toy. If you can’t get them to go in far enough, use a pen to push them in farther. Stitch up the opening with the blanket stitch and tie off the thread by pulling the thread through the middle of the two pieces of felt, tying a knot, and tucking it inside the felt.

How cute are they?!

Hope your kitty enjoys them as much as mine does!
-Jessie